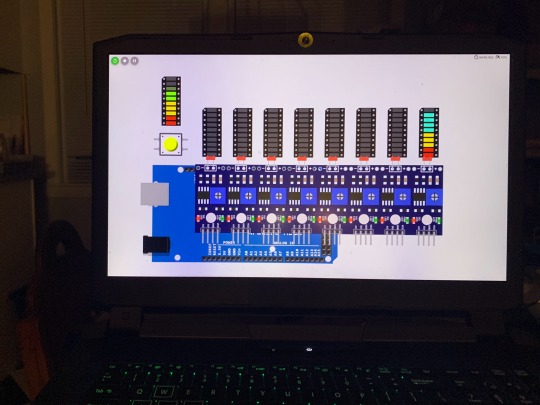
#arduino courses
Explore tagged Tumblr posts
Visit Tumblr Blog
Explore Tumblr blogs with no restrictions, modern design and the best experience.
Last Seen Tumblr Blogs


Fun Fact
Total funding amounts to $125.3M.
Text
Arduino Courses and Certification
Arduino is more than simply a platform; it's a starting point for learning the fundamentals of programming, electronics, and problem-solving. From basic LED blinkers to intricate robotics, Arduino boards enable users to construct and manage hardware systems, including sensors, motors, and other electronic devices.
Key reasons to learn Arduino include:
Real-world applications such as smart systems, environmental sensors, and home automation can be implemented with Arduino
Practical, hands-on learning in electronics and coding is made possible with Arduino, which is a great tool in the tech industry.
Career Opportunities: An understanding of Arduino can lead to a variety of tech positions, particularly in embedded systems, robotics, and the Internet of Things.
Top Arduino Courses to Consider
Arduino for Beginners
Arduino Step-by-Step: Getting Started
Arduino Platform and C Programming
Creative Applications of Arduino
Introduction to Robotics with Arduino
Benefits of Arduino Certification
Career Advancement
Enhanced Learning
Recognition in the Industry
Project-based Skill Development
For anyone interested in technology, taking an Arduino course and earning a certification can alter everything. Arduino provides easy and gratifying ways to accomplish your objectives, whether you want to learn useful electronics, explore robotics, or create Internet of Things solutions. Unlock the potential to realize your tech ideas by beginning your education today.
To know more click here
0 notes
Text
Local Guy Successfully Interacts With Contraption
#another lab mailed me an apparatus#i had no expectations for my capacity to operate the apparatus but it turns out that uh#when someone sends you prewritten code to run an arduino that only needs to control one dimension of one motor#you can just run the code. it all works fine.#really absolutely nothing to be done i got it all worked out in like 2 hrs of combined testing and setup incl sterilizing everything#now of course the actual troubleshooting will be if for some reason my tissues are different from the ones theyve tested#e.g. hate to grow on silanized things (won't happen)#or rupture in response to insult (could happen but also these cells are not actually very fragile)#but that part is my actual job. which troubleshooting an arduino is not.#so that part i feel less completely unable to make predictions about#anyway. guy can plug 2 things in. big news! big cool exciting news for everybody#box opener
6 notes
·
View notes
Text
a few years back my car insurance company offered me a discount if i stuck a dongle in my car that would tell them how i drive (specifically reporting hard accelerations and stops), with a base discount of 10% even if i drive like a madman up to 40%ish if i drive like a grandma. and of course naturally my first thought was "huh i bet i could make something running off an Arduino that filters hard brakes and accelerations out of the incoming data stream to get that 40% discount" and i got as far as looking up OBD2 protocols before realizing that that would just be insurance fraud. yes im an engineer raised by two engineers how could you tell
39K notes
·
View notes
Text
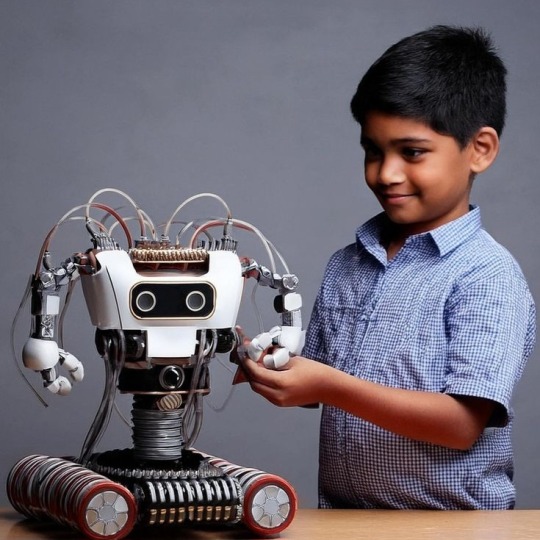
Unlock the Future with Robotics: Join the Best Robotics Classes in Mumbai!
In today's fast-paced world, technology and innovation drive the future, and robotics is at the forefront of this revolution. Whether you're a school student, a young learner, or someone curious about robotics, learning this dynamic field can unlock endless possibilities. If you want to get started, Technobotics Robotics Classes in Mumbai is the place to be. Let's dive into why these classes are perfect for your child's bright future!
Why Choose Robotics Classes for Kids in Mumbai?
Incorporating robotics into a child's education is no longer just an option but a necessity. Robotics for school students helps develop problem-solving skills, fosters creativity, and encourages teamwork—all of which are essential in today's competitive world. Technobotics offers hands-on learning experiences that engage young minds and prepare them for careers in fields like engineering, technology, and artificial intelligence (AI).

What Makes Technobotics Unique?
Technobotics, a leading techno school for robotics, offers a range of robotics courses for kids that go beyond the basic knowledge of coding and circuits. Here are some reasons why Technobotics Robotics Classes stand out:
Tailored Programs for All Levels: Whether your child is a complete beginner or already familiar with the basics of robotics, Technobotics offers classes that cater to different age groups and skill levels. From basic robotic kits to advanced autonomous robotics courses, your child will progress at a pace that suits them.
Hands-on Learning: Children not only learn theories; they also create robots! The curriculum is designed to improve creativity and practical skills. Students work on exciting projects, learning everything from Arduino programming to autonomous robotics. Students work on exciting projects, learning everything from Arduino programming to autonomous robotics.
Future-Focused Skills: Robotics involves a blend of Science, Technology, Engineering, and Mathematics (STEM), making it the ideal foundation for future careers. At Technobotics, students develop coding, problem-solving, teamwork, and innovation skills—traits that will set them apart in the tech world.
Safe and Interactive Learning Environment: The courses are designed to be enjoyable, engaging, and informative, allowing kids to explore their curiosity within a safe learning environment.
What Will Your Child Learn at Technobotics?
Technobotics offers a variety of robotics courses designed for different interests and expertise levels:
Autonomous Robotics (With & Without Programming): These courses teach students how to create robots that can operate independently without constant human control. Programming skills are also covered to enhance robot functionality.
Arduino Programming for Beginners: A beginner-friendly course that introduces kids to the programming world with Arduino, empowering them to create interactive robotics projects.
Breadboard Electronics: This course covers the essential electronics concepts needed to build functional robots.
With these well-rounded courses, your child will be on their way to mastering robotics and shaping a bright future in technology.
Why Robotics is the Future for Your Child
In an era where AI, robotics, and automation are transforming industries, kids must start learning about these technologies early on. Enrolling in Technobotics robotics classes for school students will give your child a competitive edge in their academic and professional pursuits. The skills learned will be invaluable in robotics, engineering, software development, and beyond.
Conclusion: Start Your Child's Robotics Journey Today!
If you want to give your child the best foundation in robotics, Technobotics Robotics Classes in Mumbai is your answer. With a focus on hands-on learning, innovative thinking, and a passion for technology, Technobotics is more than just a school—it's a launchpad for your child's future in robotics. Visit Technobotics Robotics Classes today to learn more and enrol your child in Mumbai's most exciting learning experience.
#robotics for kids#robotics classes#STEMEducation#robotics in mumbai#arduino programming#robotics courses#breadboard electronics for beginners
0 notes
Text
also what did i do that the last chunk of recruitment emails that I've gotten have been for machine operation or hardware engineering
0 notes
Text
Teaching Kids the Basics of Electronics and Coding with Arduino
Are you looking for a fun, hands-on way to introduce your kids to the world of electronics and coding? Look no further than Arduino!
Arduino is an open-source platform that allows users to create and control electronic projects through coding. This makes it an excellent tool for introducing kids to the basics of Electronics and coding in a way that is both engaging and accessible.
One of the best things about Arduino is its versatility. You can create a wide range of projects, from light-up robots to temperature sensors, all using the same platform. This means that there’s no limit to what your kids can create with Arduino, and it’s a great way to encourage their creativity and problem-solving skills.
Getting started with Arduino is easier than you might think. The platform is designed to be user-friendly, with plenty of resources available Online to help beginners get started. There are also countless tutorials and project ideas available, making it easy to find inspiration and start creating right away.

Photo by Arnold Francisca on Unsplash
One fun project that kids can create with Arduino is a light-up Robot. Using simple components like LEDs, resistors, and a servo motor, kids can create a robot that can move and light up in response to different stimuli. For example, they could create a robot that moves forward when it senses light or one that spins in circles when it hears a sound.
Another great project to try is a Temperature Sensor. With a few basic components and some simple Coding, your kids can create a sensor that can measure the temperature in a room and display the results on an LCD screen. This is a great way to introduce them to the basics of programming and engineering while also teaching them about the importance of temperature control.
Overall, Arduino is an excellent tool for introducing kids to the world of electronics and coding. Its versatility, ease of use, and endless possibilities make it a fun and engaging way to encourage creativity, problem-solving, and STEM learning. So why not give it a try and see what kind of amazing projects your kids can create?
#artificial intelligence#coding#education#programming#coding for kids#digital world#future#innovation#tech#coding course#coding for beginners#engineering#programmer#javascript#learn to code#arduino#3d printing#smart house#smart
0 notes
Text
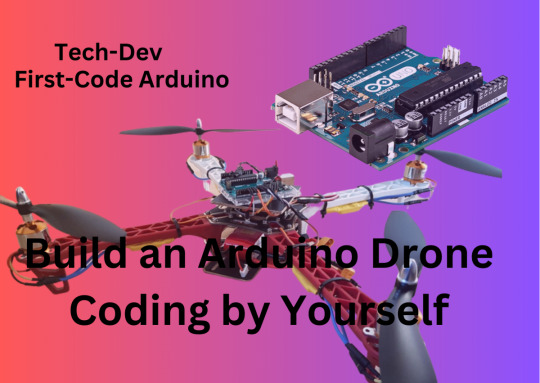
Learn to Make the Drone through Arduino Uno Yourself || Chapter#1
Learn to Make the Drone through Arduino Uno Yourself || Chapter#1 #code #learn #homemade #drone
To make the Drone you may Understand the Basics of Arduino Drone coding is written in C++ Language which is not much hard but to understand and write the Code yourself. You must understand the basics of arduino code and electronics Components. Here is your the first chapter and begin of our Drone programme If you want to learn the C++ more deeply you may prefer to my C++ Programme Here You…
View On WordPress
#arduino tutorial#coding#dailyprompt#dailyprompt-1996#dailyprompt-2000#Drone#earn#free course#Home#homemadedrone#learn#learn and earn#learn to code
1 note
·
View note
Text
Ad | Some Humble Bundle Goodies
One for the audio engineers - The Audio Arcade bundle gives you a whole bunch of royalty-free music and SFX as well as plugins to insert in all the major game engines. Ambient tracks, environmental sounds, explosions, you name it.
Money raised goes towards Children's Miracle Network Hospitals.
For those who dabble in Virtual Reality, the Upload VR Showcase with Devolver Digital has a bunch of Serious Sam VR games as well as the Talos Principle, a really solid puzzle game.
Money raised goes to Special Effect which helps people with disabilities enjoy games via accessible controllers. I've seen the stuff they do and it's honestly great.
Want to get into programming but don't know where to start? The Learn to Program bundle has a tonne of resources covering everything from HTML and CSS through to Python, C# and Ruby.
Money raised goes towards Code.org which seeks to expand participation in computing science by helping women and students of colour.
The Future Tech Innovators Toolkit is a software bundle with courses on Robotics, Electronics and programming with Raspberry Pi and Arduino.
Money raised goes towards Alzheimers Research UK.
The Home How-To Guides bundle offers a complete set of books for home improvements and projects. Want to know more about plumbing, home repair, bathrooms, wiring or carpentry? This bundle has you covered.
Money raised goes to It Gets Better, a charity that supports LGBT Youth.
Want to pick up the latest Elden Ring DLC? It's also available on the Humble Store with the key being redeemable on Steam.
105 notes
·
View notes
Text
The Übersaw build breakdown, Part 1: (enjoy!)
Note: I'm more than happy to answer any and all questions about this build. Want me to breakdown a specific step or detail, please ask!
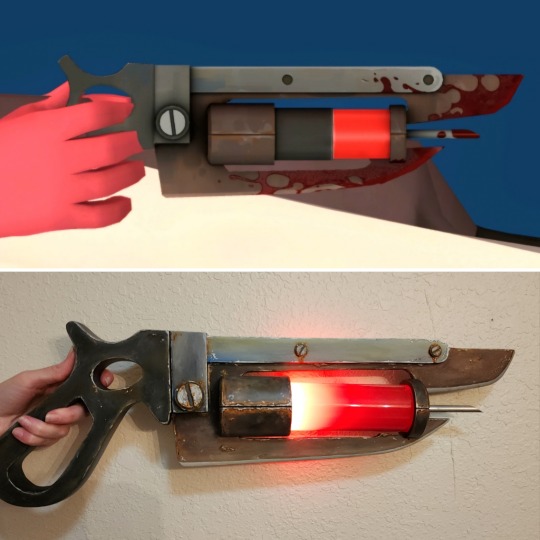
From top reference, to bottom complete, this build was a challenge from start to finish and required me to learn a ton of new skills, and reach out to a variety of people for help/advice/brainstorming! But when I decided I was finally going to make my dream cosplay of Medic, I knew this is the saw I wanted to make along with it.
Every piece was made from scratch, and includes sintra, pla 3d printing, resin printing, acrylic tubes, a straw, bondo, E6000, hex bolts, led ring light, arduino trinket, metal switch, aaa battery pack, misc. wiring, spray paint, acrylic paint, and a whole lot of sanding sanding sanding!
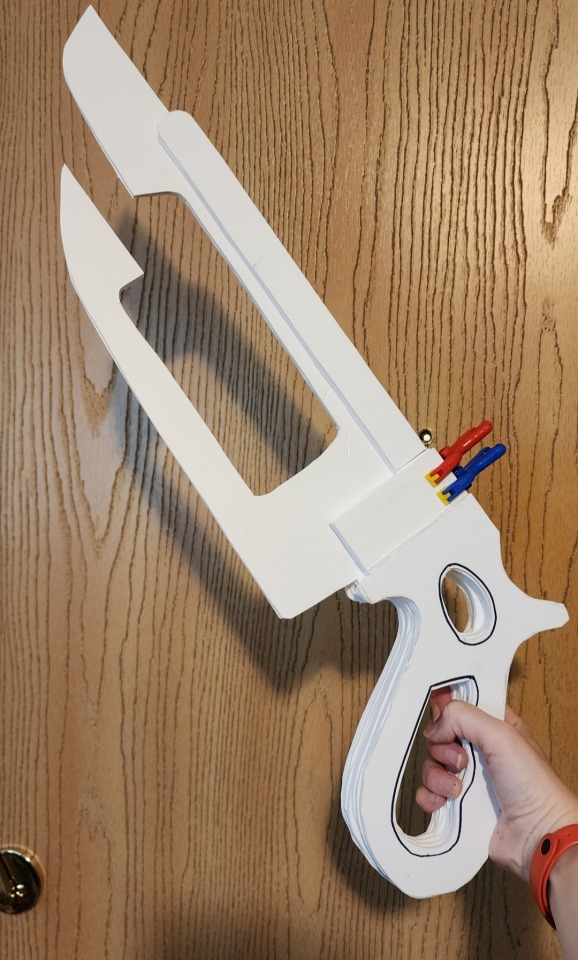

I always wanted to stay as true to the original design as possible, but knew adjustments would have to be made, moving a model from a game to real life. Some details I wanted to keep a true as possible, such as the base shape and size. Some aspects were modified deliberately to fit better with the overall aesthetic of the specific version of Medic I was creating; such as smoothing out the edges of the handle, rather than keeping them sharp like in the game. (Something that would make it more realistic overall, a goal I kept in mind through every piece of the costume.)
One such change was adding liquid to the Übersaw core and an led light that pulses red. Looking at the base design, and the color palette the original creators used, they intrinsically translated in my mind to "liquid" and "light" rather than just a flat color. Thinking about Medic and his designs, I figured an ominous, pulsing red would be perfect for when the Übersaw was fully charged. (Plus it would look really cool, so... that definitely influenced my decisions!)
I mixed up a concoction of distilled water, red and silver mica powder, and filled an acrylic tube with the mixture. There's actually two tubes, the smaller inside one helps reduce water weight on this already hefty prop.

Of course, these changes also meant I needed to learning how to code an arduino trinket (which ended up being a lot of fun!), and create a special holder at the base of the Übersaw to hold the ring light, trinket, switch, battery pack and wiring. Not to mention it had to be accessible so I could change the batteries out when needed. That's when it was time to ask for help from some talented friends!
Here's what the resulting holder ended up looking like! (Not pictured is the ring the light sits on) It was 3d modeled and printed in PLA by my friend with some imput by me, but he knows so much more about this stuff I was happy to let him take the lead! The design includes hex bolts to secure the light holder to the Übersaw like a clamp, but also allows it to be opened in half for easy access to the batteries/any electronics that are having issues.
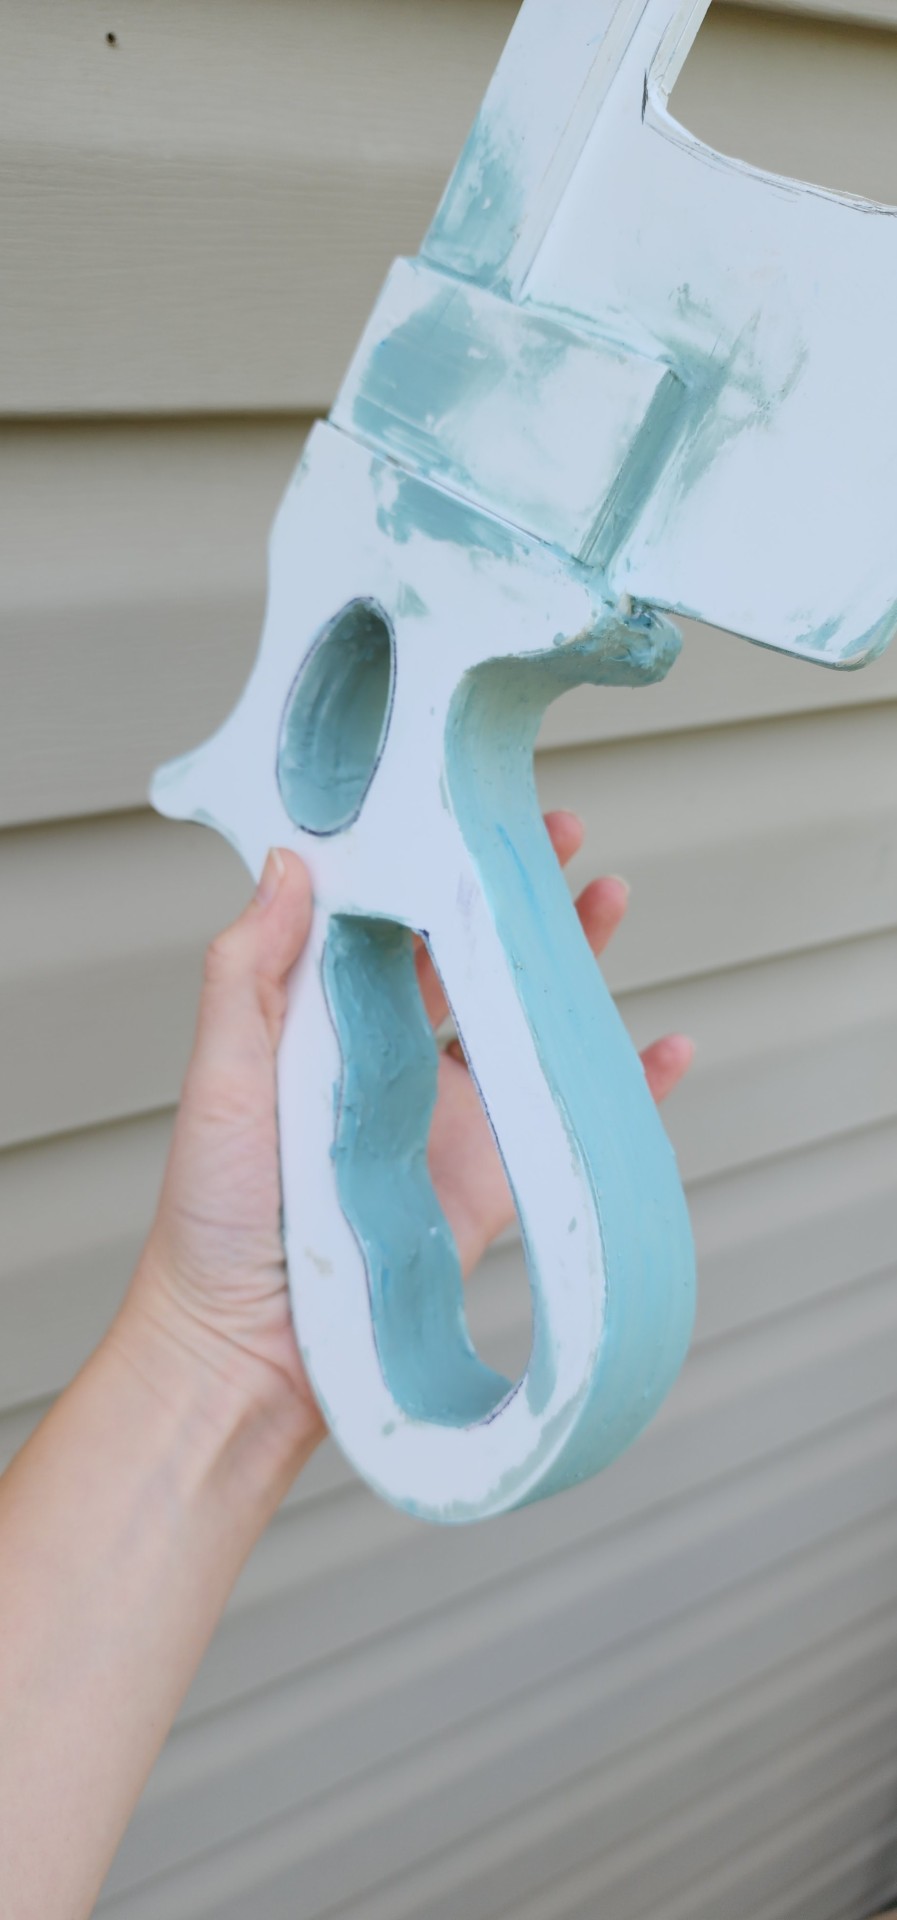

The base of the whole saw is sintra (pvc board), in many layers. The layers were then blended with Bondo and SO MUCH SANDING. After the piece looked like a cohesive whole, rather than 8 layers of plastic board, it was base coated with spraypaint and detail painted with acrylics. (I say this as though it was a simple task, but the spraypaint fought me every step of the way, had to be constantly re-sanded, and some layers refused to dry at all and had to be varnished to remove the tackiness. It was a trial to be sure!)

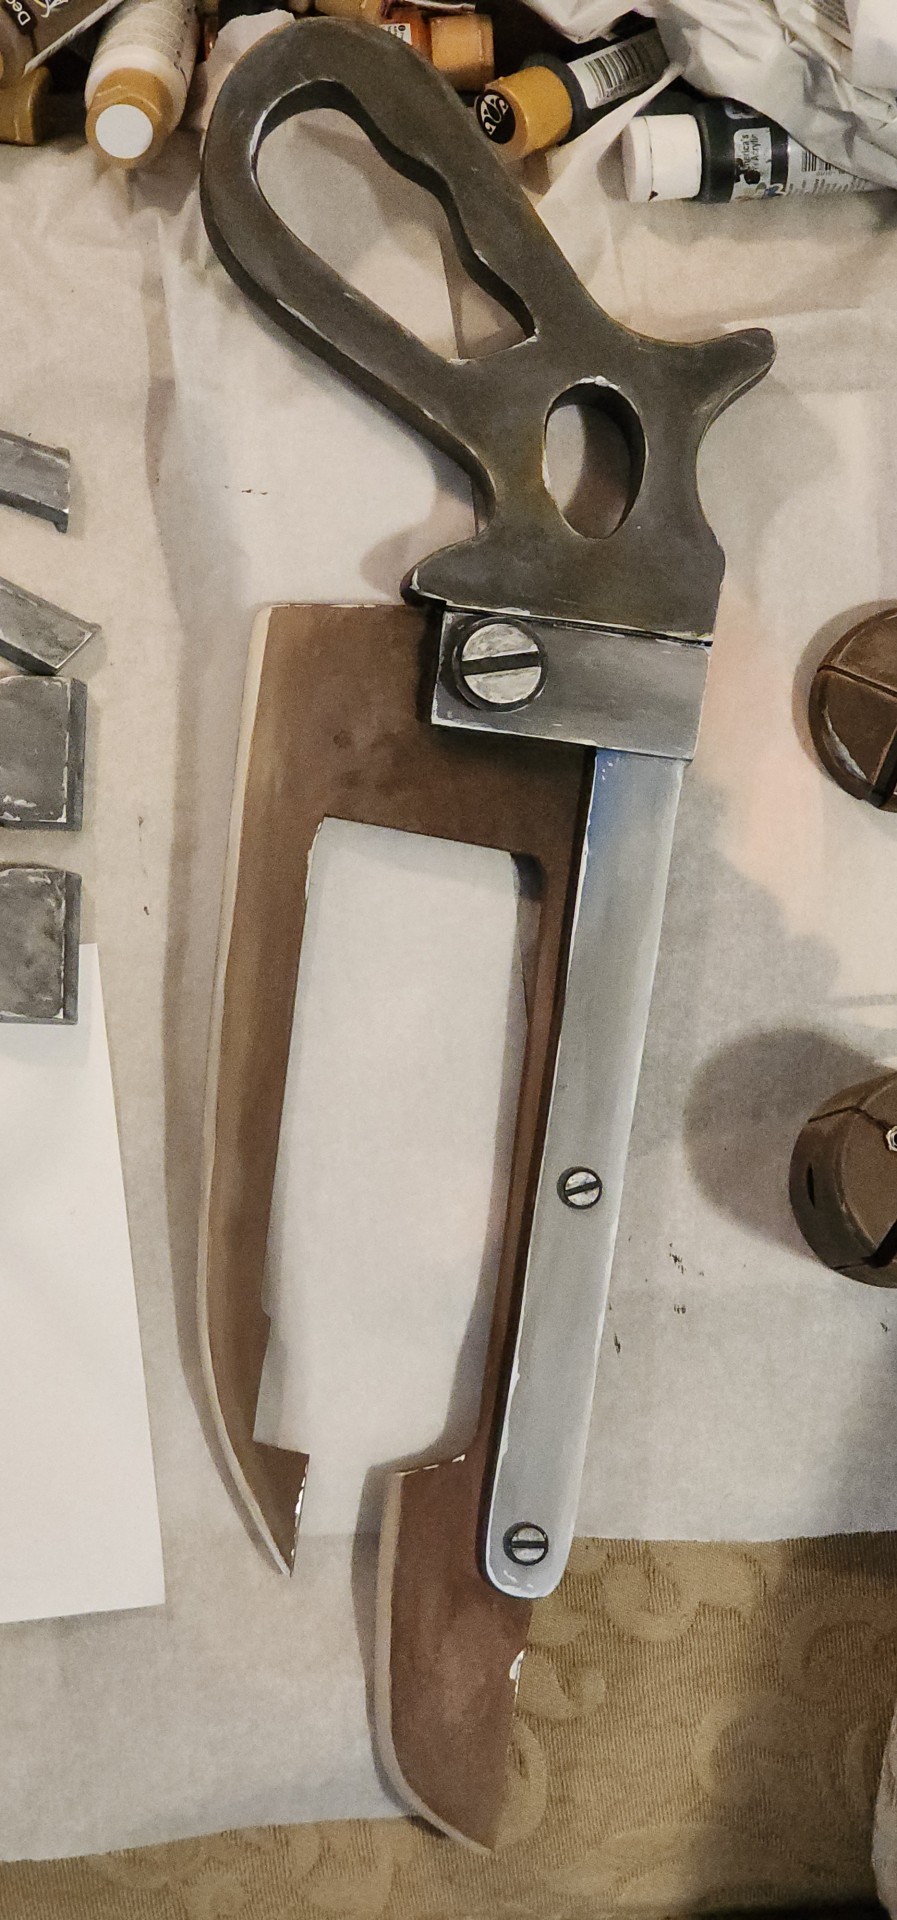
But after all was said and done, it was finally time for detail painting: My favorite part of any project! (Continued in part 2)
#cosplay#team fortress 2#tf2#tf2 medic#medic#ubersaw#cosplay wip#sisu squid stuff#tf2 cosplay#tutorial
47 notes
·
View notes
Text
So I've decided to try something using my LittleBits Arduino bit and my LittleBits Adapter Eurorack module: the Dumbest Possible Quantizer.
(To overexplain, a quantizer takes a continuously varying voltage as an input and outputs a voltage that follows it, but in defined steps. The usual use case in Eurorack is mapping a control voltage onto the levels needed to produce, in the volt per octave tuning, a musical scale; you run random voltage levels through and get more musical results.)
Quantizer modules typically support different scales, modes, and keys, and sometimes even temperaments, but for the Dumbest Possible Quantizer, I'm limiting things to the bare 12-tone chromatic scale. And as suits the title, I'm doing this in the simplest possible way: I'm taking the 10-bit ADC value of the input — a number between 0 and 1023, covering from 0 to 5 volts — and mapping that onto the 60 midi notes that cover those five octaves. I'm then immediately turning around and mapping those 60 notes onto the 8-bit (0-255) value that the PWM "analog" output can take. This is nobody's idea of the proper way to do this, but since I actually had decent success using the second half as a USB MIDI to CV converter on this board already, it has a reasonable chance of approaching the desired functionality.
Long term, of course, I intend to build or otherwise acquire a quantizer module with real functionality, probably using a proper DAC; I'm following the in-development Teensy 4.1-based Ornament and Crime upgrade with great interest. But I really want to see how much I can do with very low effort!
9 notes
·
View notes
Text

04.03.2025
This is the last week of the semester and has been a pretty hard one.
Yesterday I went to buy some components for a project and finish studying for an exam today.
Today I did said exam and I think it went well, after that I worked a little more in my digital electronics robot, it's almost done but there's still some code to correct. Also I got my grade for the last exam in that class and I did pretty well ^-^
My plan was to finish the robot project today but there's still some stuff to correct and anyway the teacher gave us more time up to Friday so it's ok.
Then for the other project I was going to work on it during the afternoon but I got my laptop fried lol
So lesson for future self it's better to just upload the code to the Arduino board and then connect it to the wall instead of an USB port specially when using power circuits with more than 5V.
Of course this is a tragedy that will make me lose some precious time, but I already did all my exams and did a good part of my projects so my teammates will have to support me a bit more thought them while I get my PC repaired, hopefully it isn't so bad or super expensive but I'm trying to not have so good expectations and just accept destiny.
3 notes
·
View notes
Text
Unlocking the Future: Why Robotics Classes in Mumbai Are a Game-Changer for School Students
Technology is shaping the world at lightning speed—and children today are not just passive users of tech; they're its future creators. That's why forward-thinking parents and schools are increasingly turning to robotics classes in Mumbai to equip students with skills far beyond the classroom.

The Rise of Robotics in Education
In recent years, robotics has gone from niche interest to mainstream essential. It combines coding, electronics, and design, bringing science and math to life. More importantly, robotics helps develop problem-solving, creativity, and logical thinking while incredibly engaging.
Search terms like "best robotics classes in Mumbai" or "robotics for school students" have surged, reflecting growing interest among parents and educators alike.
Why Technobotics?
Regarding quality robotics courses in Mumbai, Technobotics has become a trusted name. With over a decade of experience, they've developed an education model that's both accessible and effective. Whether your child is just starting or looking to deepen their understanding of programming, Technobotics offers a range of tailored programs.
Their curriculum covers everything from introductory robotics and electronics to advanced Arduino programming. The focus is on giving students real, practical exposure to how things work and how they can build them.
Designed for School Students
What makes Technobotics stand out is its clear focus on robotics classes for school students. The programs are age-appropriate, thoughtfully structured, and aligned with children's school learning. Introducing robotics early gives students a strong foundation in STEM and the confidence to explore new technologies.
Many students begin with basic logic building and electronics before moving on to coding, sensors, and, eventually, creating their projects. The classes are designed to be interactive, project-driven, and rooted in real-world applications.
What Parents and Schools Look For
When choosing the right robotics classes, parents often search for courses that are:
Educational but fun
Run by experienced mentors
Hands-on with real outcomes
Adaptable to different skill levels
Connected to future career skills
Technobotics meets all these needs, so it's consistently listed among Mumbai's most recommended robotics classes.
The Road Ahead
As AI, automation, and smart devices become part of everyday life, students who understand the mechanics and logic behind them will have a clear advantage. Robotics isn't just a hobby—it's a gateway to engineering, technology, design, and innovation careers.
This early exposure is invaluable for school students. They learn how things work and gain the confidence to create their ideas.
Final Thoughts
If you're looking for a place where your child can explore, build, and thrive in a tech-driven world, Technobotics is an ideal starting point. With carefully crafted programs and a passion for STEM education, it offers some of the best robotics courses in Mumbai today.
#technobotics#robotics for kids#robotics courses in mumbai#coding and robotics#arduino programming courses#stemeducation
0 notes
Text
Custom trackball? Custom trackball.

Making a custom trackball's easier than I expected! In great part thanks to the folks making arduino libraries for the parts, of course!
Still not 100% sure on a final design, but the electronics work!
Ball's on BTU bearings for no stiction, sensor's a PMW3389, and going with an analog axis for the scroll wheel which works surprisingly well after tuning a pressure curve.
6 notes
·
View notes
Text
ghostie arduino chanukiah
for xanuka this year, i made a little electronic chanukiah that i want to share! i know i’m not the only person who can’t do flame-based candles for some reason or another.
this chanukiah is an online simulation that you can run in any web browser, and it is, in my grandiose and objectively correct opinion, better than any other electric chanukiah out there right now.

lots of electric chanukiot do a decent job at emulating the visual appearance of a flame-based chanukiah. the goal with this project was to emulate not only the 🕎visual appearance🕎 of a chanukiah, but also the 🔥ritual experience🔥 of lighting the candles and watching them burn.
some neat features of the ghostie arduino chanukiah:
- candle representation: each candle is represented by a stack of LED lights, and you can make the candles any color you want! if you can express it with a hex code, it’s a valid candle color. there’s also two bonus gradient patterns.
- lighting the candles: you press a button to light the shamash, then you light each candle that you want by moving a slider that lights up its light sensor.
- watching the candles burn: after a candle is lit, the top LED begins to flicker like a flame! and after that, the candle slowly and semi-randomly begins to burn down- the top LED goes dark, and the next one in the stack begins to flicker, and so on, until the light goes out at the bottom of the stack.
- clean up: all the candles will burn out on their own over the course of 30-ish minutes(plus or minus like, 20. i should really optimize the burn pattern a little, lol). after that, you can stop the simulation and reset it for the next night.
it works great on both mobile and desktop, so put it on whatever device you want. a note for mobile users: instructions for use are in the “code” tab, on the top right!
check it out at: https://wokwi.com/projects/353600148292695041
#i realize this post is several days late but OOPS and WHATEVER#please enjoy it!!!#jumblr#menorah#my art#jewish art#judaica#hanukkah#chanukiah#ghostie chanukiah 2023#arduino
18 notes
·
View notes
Text
Gear Up! A Beginner's Guide to Learning Robotics
Hey Tech Enthusiasts!
Are you fascinated by robots and want to dive into the world of robotics? Learning robotics can seem daunting, but with the right resources and mindset, you can get started!
Step 1: Understand the Basics
- Familiarize yourself with programming languages like C++, Python, or Java
- Learn about electronics, circuitry, and microcontrollers (e.g., Arduino, Raspberry Pi)
- Get a grasp on mechanical concepts (e.g., kinematics, dynamics)
Step 2: Choose Your Path
- Robotics kits (e.g., Lego Mindstorms, Makeblock)
- Online courses (e.g., Coursera, edX, Udemy)
- Books (e.g., "Robotics, Vision & Control" by Peter Corke)
- Join online communities (e.g., Reddit's r/robotics, r/learnprogramming)
*Step 3: Practice & Build*
- Start with simple projects (e.g., line follower, robotic arm)
- Experiment with sensors, actuators, and control systems
- Join robotics competitions or hackathons
Step 4: Network & Learn from Others
- Attend robotics conferences, meetups, or workshops
- Collaborate with fellow robotics enthusiasts
- Participate in online forums
Resources:
- Code.org's Robotics Course
- Robotics Academy
- Robot Operating System (ROS)
Inspiration:
- Boston Dynamics' robots
- NASA's Robotics Alliance Project
- Robot Wars
Conclusion:
Learning robotics takes time, patience, and dedication. Stay curious, persistent, and creative!
What's your favorite robotics project or resource? Share in the comments!
[Reblog if you're interested in robotics!]
3 notes
·
View notes
Text
DeerHead EMC-V1 baby pictures.. She doesn't even have all of her leg servos yet 🥺 (EMC stands for "Electro-Mechanical Chihuahua"!)

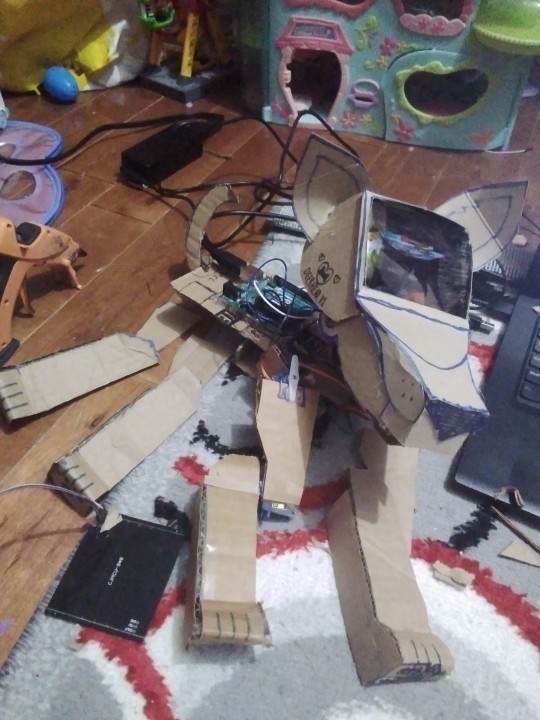

Her snout is a bit huge for this first run, but really this is just a draft while the 3D printer is broken; the LED matrix in her head was also defective right out of the package, as it turns out; so because it's also a little heavy, I probably won't end up using it! That's okay because atleast for the Arduino Uno, running both 15 servoes and the 64 pixel screen animations at once could be a bit much! I'm thinking of getting the hardware up and at 'em first, and making sure that I can program it to say, do a little dance for now to show that I'm up for the challenge of animating servoes with this driver library (right now I'm just testing with a live servo control program), and then I want to upgrade to a Raspberry Pi brain so that I can start giving her autonomy! When I do that, I'm going to atleast want two buttons; a back and head button to sense affection and love! Or scoulding with a tap on the head, but that might be much to program for something I'd never really need to do with a robot I programmed XD unless it ended up being more autonomous than I'm realisitcally imagining it being! I'll also want a gyro sensor, so that she'll be able to tell if she's fallen over (maybe combined with soft buttons on her front paws sensing that they aren't touching the ground), and self-right! She will also have a distance sensor on her chest to avoid bumping into things, and for a general sense of depth; and beside that, a microphone (connected to a voice recognition module? I feel like Raspberry Pi wouldn't need that, I haven't looked into it though), to understand voice commands.. Or just "I love you" whilst receiving cuddles 😄 and of course, there would be a speaker, likely in the back of the head or also near the distance sensor depending on the size; for this maybe I can use some old furby boom parts I have laying around 😆 I'd probably need a module for the speaker though, so the Pi knows it's a speaker, and that'd probably come with another speaker.. And to power it all? A six volt LIPO battery! Or would six volts be anywhere near enough for all that combined with running the programming of the robot? Such I'd have to research lol, but furthermore.. I welcome EMC-V1 to the world!!! And tomorrow my new servoes will come in, hopefully she'll be able to walk too by then 😄
5 notes
·
View notes